Showing posts with label finished stuff :: sewing. Show all posts

Tuesday, January 15, 2008

Old News!

[Part I: Christmas Stockings]

Today is my two-year blogiversary. I thought I'd mark the day by actually blogging for a change.*

And rather than offering any real thoughtful remarks about my blogging journey, and/or the online craft community, and/or how the advent of Ravelry might be changing both my personal journey and the online craft community as a whole, I'm just going to jump right in with a little FO-report. Because honestly, every time I try to write anything more substantial than this, I get completely bogged down and overwhelmed. So here we go.

Christmas stockings! Happy January 15 to you.

I realize it doesn't look like much. But these 8 stockings (there are two little ones down at the bottom that didn't photograph well) represent a moment of real insanity on my part.

My Old Man practically begged me not to do any crafting for Christmas. He didn't want me to have the stress of that (during what is already a pretty stressful time of year for us, work-wise), which would mean added stress for the whole household. Because when earthchick is stressed-out, everyone has to deal with it. I like to suck people into my vortex whenever possible.

At any rate, I did greatly cut back on my Christmas crafting list. But in retrospect, I still tried to do too much, given our work situation, and given the fact that we were hosting out-of-town family (and when I host, I go a bit overboard with the cooking and the baking [but not the cleaning!]), and then leaving for 9 days on a 2000-mile road trip. December 22nd found me holed away in my study, cutting and sewing stockings a few hours before serving our big Christmas dinner (yes, I said the 22nd - we did our big dinner early this year). At approximately 4:00 that afternoon, with the stockings done and a puppet theater still to go, I concluded that I probably wasn't going to sew and hand-embroider a Christmas tablecloth and matching napkins in time for dinner. At approximately 4:05 I began to wonder if something was actually wrong with me, mentally speaking, that I had still been holding out hope of getting such a project done. But I digress.

Last year, I knit my MIL a stocking and sewed stockings for the boys. My Old Man and I had stockings I bought from our first Christmas together. But this year, my BIL was coming too, and even though my MIL volunteered to bring a stocking for him, I used his visit as an excuse to make another stocking. And then I used that as an excuse to make everyone a new stocking (except for the boys). Because the stockings all need to coordinate, right? RIGHT?!?


mine, My Old Man's, Little Buddha's, Tiny Dancer's, MIL's, BIL's


pattern: just a basic free pattern from about.com
fabric: basic cotton from Joann's, cuff from leftover fleece
made: in a couple of hours
verdict: unexceptional, but not ugly
[some complained that they were too small (those people shall remain nameless, but I will say that it wasn't our guests - how rude would that be? - and it wasn't our sons because they don't know the difference)]

I said I made 8, and I've only shown you 6. There were only 6 people here for Christmas. So why would I make 8?

Because of course I had to make a couple for the cats.

Yeah, there may be something wrong with me, mentally speaking.


*I am also marking the day by failing to meet a writing deadline that I am under contract for. Does the fact that I am blogging instead of working on that writing indicate that perhaps I have problems with time management and priority-setting? [Or maybe you already had that impression from the whole "let's make stockings for the cats instead of acting like a proper host to my guests" episode.]

Monday, November 05, 2007

My New Standby

Nevermind that I was wrung out from the intensity of the all-consuming task that is costume-making (thanks for all the costume-love, y'all!). Nevermind that I still had 1/4 of a shawl left to finish for a wedding I'm in. I needed this. And I needed it now.

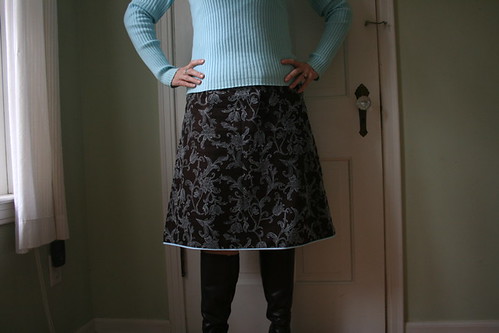
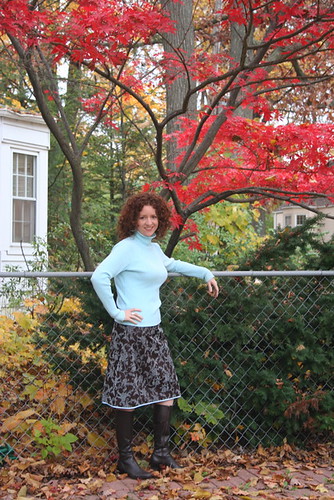
brown skirt, blue piping

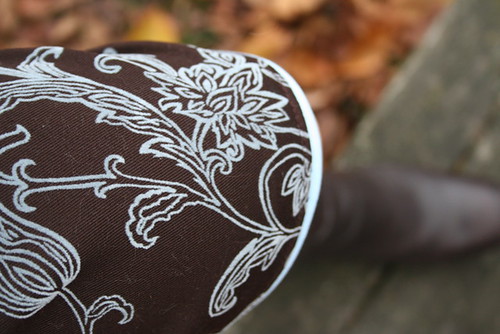
I found this fabric tucked away on the shelf with the corduroy, which is what I went to the fabric store for. This isn't corduroy but it was simply too lovely to pass up. A chocolate brown cotton with pale blue, velvet-y flowers embossed on it. Gorgeous, and super-cheap. I bought a pile of corduroy fabric that day, at a huge sale at Joann's, with big ideas of everything I was going to make - jackets for the boys! pants for me! skirts for me! etc.! Me likey the corduroy. So far, none of that has come to pass. But I couldn't resist banging out this little number.

brown and blue A-line skirt

pattern: simple size-zip A-line skirt, from Sew What? Skirts
fabric: brown cotton with pale blue velvet embossed flowers, super-cheap
notions: zipper, pale blue piping. PIPING, people! I LOVE THE PIPING!
made: in an afternoon last week, after I finally got the boys' costumes off my machine
modifications: This book is really a guide to making your own skirts based on your own measurements, so there really is no such thing as modifications. I will say that I woke up the morning I was going to make this, with a very vivid vision in my head of light blue piping on the trim. I really think it makes the skirt, and was so pleased to have thought to add it.
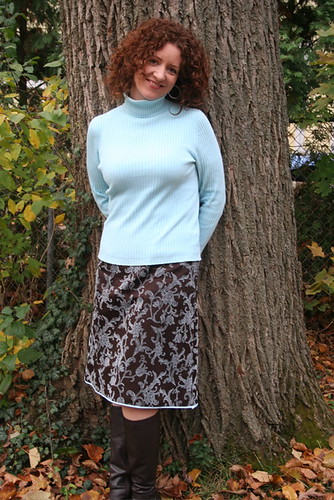
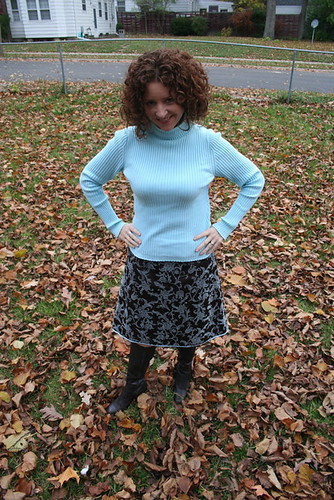
verdict: I'm sure you've figured out by now. I LOVE IT. These super-cheap, super-quick, super-cute A-line skirts have become my new standby. Before this year, I always tended towards very long, slim skirts, primarily in neutral solids. Making my first knee-length A-line skirt, from Sew U, in January was a real departure for me. I made another one from that pattern in April, and felt so-so about it. But once I got my hot little hands on the Sew What? book, I was hooked. My little orange print skirt and cherry print skirt became my quick favorites, and they never fail to elicit compliments, mostly from people who don't know that they are handmade. More importantly, I just plain enjoy wearing them. So I thought I needed one for fall, and I couldn't be more pleased with it. I cannot recommend this book highly enough to anyone who has been considering trying to sew but has been nervous. This book offers such a simple, straightforward approach, and the results are so immediately gratifying. It has taught me, among many other things not to be afraid of installing a zipper (but if you are, the book offers many no-zip options).


For fall: brown boots, new skirt, blue turtleneck, and a tree

Soon, I will venture on to try a few other skirt styles from the book. But it will be tough, given how much I have fallen for the look of a knee-length A-line. There is something just so kicky about it, wouldn't you agree?


IMG_3473

under the Japanese Red Maple

Hello, Fall!
At last!

Monday, September 10, 2007

Happy Scholastics!

When Tiny Dancer announced to the mentally ill homeless man at our church that he and Little Buddha would be starting school this week, the man shook both boys' hands and said, "Happy scholastics!" He also said, "Don't step in dog sh*t." Which is, of course, good advice both for preschool and for life. But I digress. "Happy scholastics" has seemed to me a delightful and perfect wish for two little boys embarking on the first day of many years of formal education. Today was that day.

Little Buddha and Tiny Dancer, ready for the new school year.

I found out at their orientation meeting a couple of weeks ago that they were required to use totebags for school instead of backpacks. This seemed to me a perfect excuse to make bags for them, even though the school had some for sale. It also seemed to me the perfect excuse to finally invest in some superbuzzy fabric. I let the boys each choose their own.


Little Buddha went with cars.
I am crazy about this print.


Tiny Dancer went with a vintage-looking train print.

And I went with my first Simple Sewing Project.


I could not be more pleased with the results.

Once I got all the pieces cut, these came together amazingly quickly. After doing Tiny Dancer's, I realized how flimsy these things felt with lightweight cotton. So for Little Buddha's, I added fusible interfacing to the bag and then added a lining. To remind myself of how to do a lining, I referred to this great super eggplant tutorial. It seems only fitting that the first fabric I've ever bought from superbuzzy would be used in a tote bag, when her tote bag tutorial is how I first found her site. (which is actually strange, given how many of the blogs I now read rave about superbuzzy fabric, but back when I was first looking for a tote tute I guess I wasn't reading those blogs yet).

Once I did Little Buddha's lining, I really couldn't resist adding a little pocket, to hold a tiny car.


Little Buddha liked the bag so much, he asked to sleep with it last night. I like the lining and pocket so much that I intend to go back and do the same for Tiny Dancer's bag as well; I just ran out of time for that before school started.

Verdict on this pattern? It's super. Super-fast, super-easy, super-fun. But I definitely will continue to supplement it with interfacing, lining, and probably pockets. Next time, I may try using cotton flannel for the interfacing, as suggested in Bend-the-Rules Sewing.


Happy Scholastics, boys!

Thursday, September 06, 2007

Back When I Still Sewed: a Hat and a Hat

So in June I also made some hats! I feel like that needs an exclamation point because these were very! fun! hats!

Planning for the beach, I had this vision of myself in my bathing suit, a wrap, big sunglasses, and a big beachy hat. The wrap was a bust, the sunglasses got broken, and the wind always blew off my hat. At least my bathing suit was super-cute. But you are so not going to see pictures of me in it.


pattern: Amy Butler Blue Sky Hat
fabric: you guessed it - basic cotton from JoAnn's
black for the exterior and a sweet little flower print for the interior
made: one afternoon in June
modifcations: different prints for exterior and interior - I wanted a black hat to match my black swimsuit, but I didn't want it to look too much like a witch's hat
verdict: this was a fun and surprisingly simple pattern. I did have difficulty sewing through three layers of canvas, though, even with my heaviest needle. In retrospect, I wish I had done the whole hat in the floral fabric. I've decided I don't care for the two-tone look in this hat, plus the floral fabric is so sweet. At least I have enough left over to make a top out of now.
I mean, if I ever use my machine again.


The hat was so fun and came together so quickly that I decided to make another one to match my blue swimsuit. Since I'd had trouble sewing the canvas, I went with heavy fusible web this time instead.


pattern: Amy Butler Blue Sky Hat
fabric: bright blue cotton batik
made: one afternoon in June
modifications: used heavyweight fusible web instead of canvas
verdict: I love this fabric and like that the hat is the same on exterior and interior. The fusible web was definitely much easier to sew than the canvas, but the results were not as good. It has a much cheaper feel to it, and blew off even more easily than the other.

In random kindness news, sweet Mer named me as a


I was honored to be included among the rockin' blogs she listed. Thanks, Mer! What comes around goes around, so it's my turn to name some rockin' girl bloggers. Like Mer said, this has been going around for awhile and it's hard to remember who all has already been tagged, but here are just a few girl bloggers I think rock:
Rachel
Minty
Nova
Amisha
Felicia

These are just a very few rockin' girl bloggers, and only from the craft world, (and I intentionally left out those who I already know someone else has tagged). But you know, I think all you readers rock, so you should all consider yourselves tagged (guys, too!).

Tuesday, September 04, 2007

Back When I Still Sewed: a Hit and a Miss

First of all, thank you for all your fabulous responses to my last two posts! Extra thanks to those of you who let me know about the Anne of Green Gables Knit and Read Along. A convergence of too many good things at once - I can hardly stand it! Of course I signed up right away. And you should too.

So way back in June (how is it September already?), I sewed some stuff. A lot of stuff, actually. I didn't sew everything I wanted to sew, but I still sewed enough that I spent almost every day of a 4-week trip wearing at least one handmade item. (Some of it I blogged back in June). It was like sewing took the place in my life that is supposed to belong to knitting (though I did still manage to knit a sweater that month - not that I have yet managed either a photo shoot or a blog post about it). Now that time in my life seems a world away. Everything before Little Buddha's accident seems to belong to a different world than the one I live in now. I haven't touched my sewing machine since. That's partly because I need to take it into the shop for repair (the stitch length adjuster doesn't work. I get one length, all the time), and I have resisted doing it because I don't want to be without my machine (though I haven't used it for anything for more than 2 months now). But it's also because knitting has taken its accustomed place in my life again. After the accident, knitting saw me through a lot of anxiety and grief, and now I can't seem to put down the needles.

My study is still stacked with fabric I had planned to use for summer and fall projects, and I will get to some of them. Soon. I think. I hope. But for now, it is all knit, all the time. (Okay, not really. Because truthfully, there is another little hobby that has captivated me a wee bit lately, too. More about it another time.) I have been a bit astonished at the amount of knitting I've been doing (and the amount of Ravelry-based knit-plotting I've been doing). The Lace Leaf Pullover I cast on for 16 days ago? It's done except the grafting (which I hope to do tonight). That's like some kind of record for me (both in terms of project finish time and in terms of knitting monogamy). But I have these few sewing projects to show still, so show them I will.

Warning: in my haste to get these babies blogged already, I pulled off the most ridiculously quick photo shoot yesterday, complete with totally wrinkled everything. I just grabbed up all these things in whatever state I found them and put them on, in whatever state I found myself in, and went to shooting.

Enough freakin' buildup already, right? Without further ado (could there be anymore ado?), here's my poorly-executed wrinkled beach wrap:


pattern: Sew What? Skirts Breezy Beach Wrap
fabric: super-cheap cotton beach print from Hancock's going-out-of-business sale ($2/yd)
made: one afternoon in June
modifications: I wanted this to be a long straight skirt rather than a short A-line, so I made those adjustments. Unfortunately, I didn't make it nearly as long as I meant. I wanted another 5 or 6 inches. Note to self: measure twice, cut once.
verdict: Like the idea better than its incarnation. I didn't wear this at all at the beach (or elsewhere). Maybe if it had been as long as I meant. Also I made it too big in the hips. Also the pattern has you overlap the back pieces and tie in front. I prefer my wraps to overlap in front, but that means this one ties in back. Next time (if there is one), I will make the ties much longer, so I can overlap in front and still tie in front. This will probably get relegated to the scrap pile for the fabric to be harvested for some other beach project, some other time.

Next up, my usual Built by Wendy Simplicity top.


pattern: Simplicity 3835
fabric: gauzy, crinkly white cotton from JoAnn
made: one day in June
modifications: none
verdict: I really love this top. It is so simple (not just to make, but to wear - I like a nice simple look, especially for summer). It is so cool and summery. It has become my "go-to" top when I want to be comfortable but look both casual and pulled-together. White cami, white gauzy top, dark blue jeans, black sandals, I'm done. This top is a great alternative to a t-shirt. It's just as comfortable, but not as clingy.


These pictures really don't do it justice, thanks to my hasty photo shoot. But you get the idea. If you are thinking of taking up sewing and want something super-simple to start with, I cannot recommend this pattern highly enough. It gives a huge bang for the buck.

In a previous post of tops from this pattern, someone asked for any tips I might have for a beginner sew-er making this top. I am really a sewing novice myself, so there may be others out there with better tips than I have. But here's what I'd say:
  1. Choose a thin or sheer cotton fabric. This pattern can look a bit boxy otherwise. (A way to combat that would be to add darts in the back, but a true novice might not want to try that yet). This version, in this gauzy cotton, has been my favorite of the three I've made.
  2. Check the finished measurements for the sizes, rather than going by the size the pattern recommends for your personal measurements, and choose how close you want it to fit. Patterns typically build in more ease than I really want in my clothes. For this top, I ended up going down two sizes from what it recommended based on my measurements.
  3. Do not be afraid of the elastic, but do be prepared for it. The elastic is what makes this top easy - it means you don't have to sew a real neckline or set in the sleeves. But elastic can be a bit frightening for a beginner. Just follow the directions and you'll be all right, but do make sure you have a way of threading the elastic into the casing other than just your finger (I've tried that - it doesn't work so well). You can buy something called a "bodkin" that is meant to help you thread elastic into casings, but I just use a safety pin. I attach it to one end of the elastic and then thread the pin into the casing first. Then I can feel where the pin is through the fabric, and I just sort of push and pull the pin along till it comes out the other end.
  4. Do not try to take a short-cut on the hems. Do it right and do a double-fold hem (fold 1/4" and press; fold another 1/4", press, and stitch). I have done short-cuts on these tops and it has left me with a frayed mess at the bottom - and it does show.
  5. Speaking of doing things "right" - do take the time to press your seams open.
So there ya go, some sewing tips from a gal who hasn't touched the machine in almost three months. I still have 5 more unbloggged FOs to show from June, but since I apparently can't show pictures without adding several paragraphs of text for each shot, and since this post is already ridiculously long, I'll stop there.

[In other news, my Sockapalooza Pal, Kristin of Spinning Athena, got her socks and they fit and she seems to like them! (I'm blogging this way late, I realize, but she did get them on time - phew!). I really loved knitting the Waving Lace socks for her, and am happily knitting myself a pair as well. For a beautiful silk version of this pattern, check out Rachel's.]


Friday, June 22, 2007

She's not.

So last month, I posted about a shirt I made that I feared would cause people to ask the question, "Is she or isn't she?" (pregnant, that is). Nancy, whose version of the shirt (Built by Wendy, Simplicity pattern 4111) was the one that first inspired me to give it ago, agreed that this pattern tends to give that look. She told me that she thought it worked best with really light materials. I also got great advice from Deborah (on Wardrobe Refashion) to look at the finished measurements of patterns, rather than automatically using what the pattern suggests is my size based on my measurements. This is the single most helpful advice I have gotten since someone showed me how to thread my machine. So with Nancy's advice, I chose a gauzy embroidered white cotton fabric. With Deborah's advice, I ended up going down two sizes. The result?


My favorite thing I've ever made.


And look - it doesn't even look like a maternity shirt.

This was honestly the most gratifying project I've done to date. One really awesome part was that several people complimented my top without knowing I had made it. Of course my enthuasiastic response to such compliments was a bit over-the-top. The day after I made it, My Old Man and I took CJ out for her 30th birthday. I got dressed and came downstairs right after our babysitter got there. Here's how the conversation went as soon as she saw me.
babysitter: I love your top!
me: I MADE IT!!!
(twirl around)
babysitter: Really?
me: YES! I'M SO EXCITED!!
babysitter: Wow. Cute buttons.
me: I KNOW!!! THAT'S MY FAVORITE PART!!! AND THEY WERE ONLY 79 CENTS!!!
babysitter: Cute.
me: I'M SO EXCITED THAT YOU TOLD ME YOU LIKED IT BEFORE YOU KNEW I HAD MADE IT!!!

I might have used more exclamation points than that.
I guess I'm kind of lucky she didn't leave after that.

Honestly, though, it was really cool to feel like something I made looked just as good as some of my favorite bought things in my closet.


pattern: Simplicity #4111, Built by Wendy
fabric: thin embroidered white cotton, from JoAnn (non-machine washable)
notions: super-cute buttons on clearance at Hancock's
modifications: none
verdict: I think it's obvious. I'm kind of crazy about it.
I did learn, though, why it's important to follow the directions when they say to stitch the armholes and then stitch them again. By the time we got home that night, I had a little hole in one of the underarms.

Isn't this fabric dreamy?


My favorite part.


As you can see, I'm pretty dang happy with it.
(Or am I laughing at the fact that over my head is the caption, in Italian: Chicken! Soup!)

Wednesday, June 20, 2007

Orange you glad I didn't say banana again?

Well, orange you?*

Y'all, I made the most fun skirt I've ever owned.
Just a simple A-line, side-zipped cotton skirt, with a little rickrack trim.
And it makes me fantastically happy.


I found this yummy orange print at JoAnn on clearance for $2/yd.
Two dollars a yard!
I had spied it earlier in the season and thought it was cute, but I didn't think I "needed" it. Once it showed up on the clearance rack, though, I couldn't resist. This little skirt only used about a yard and a half. So I call it my $3 skirt (okay, okay, plus rickrack and a zipper - I guess that makes it my $6 skirt).


pattern: Sew What! Skirts, A-Line Skirt, Fitted Waist
This book doesn't really do "patterns" per se. She teaches you how to draw your own skirt patterns based on your own measurements and specifications. It is an awesome book. I first read about it here. I would highly, highly recommend this book for anyone even thinking about sewing a skirt. It was by far the simplest skirt effort I've made (I much prefer the size-zip to the back-zip of Sew U, though with Sew What! you can choose to do back-zip if you prefer. Basically, you can do anything you want.) I added the rickrack trim that the book shows on the "Singing the Blues" variation. I LOVE rickrack.
fabric: 100% cotton, orange print.
notions: black medium rickrack, black 7" zipper.
modifications: You can't really call anything a modification since the whole book is based on modifying everything to your personal fit and tastes. Still, after all was done, I did have to add darts to fit my waist a little better. In fact, I should probably go back and add a couple more. It's a tad loose (and I can't figure out why, since I thought I measured myself pretty accurately).
verdict: I LOVE this skirt. It is comfortable, cute, and a little bit sassy. I've gotten so many compliments on it that I just want to make more, more, more. The best compliment of all, though, came from My Old Man, when he declared it "perfect." Not bad for a few dollars and a couple of hours of work!


My original plan had been to embellish with an applique on one of the lower corners of the skirt (I've never really done applique). I cut a circle out of black fabric (about the size of a navel orange) and then cut a smaller half circle out of the orange fabric. I was going to applique the half circle on top of the black circle and then applique the black circle onto the skirt. But once My Old Man declared the skirt perfect as it was, I decided to stop there (I was a little nervous about my first applique attempt anyway). Now I'm having visions of maybe making an appliqued totebag with the black and orange fabric. In my head, it looks awesome. We'll see if I actually pull it off. (making totebags is kind of far down on my list right now since I have so many clothing items I want to make first)


Close-up of the rickrack.
I loooovvve rickrack.

So, there ya go. My first summery skirt. Can you tell I'm freakin' proud?


And now for something completely different.
Dude.
Look what I did.
Or, I should say, look what I had done.
Kind of by accident.


I went in for a pre-vacation trim.
I walked out two hours and a few inches later.


But I kind of like it.


*This is the punchline from the aforementioned knock-knock joke.
Knock-knock.
Who's there?
Banana.
Banana who?
Knock-knock.
Who's there
Banana.
Banana who?
Knock-knock.
Who's there?
Banana.
Banana who?
Knock-knock.
Who's there?
Orange.
Orange who?
Orange you glad I didn't say banana again?


Tuesday, May 15, 2007

Is she, or isn't she?

She isn't. But if you saw her in this, wouldn't you wonder?

It's no secret that I wouldn't mind having another baby (note: that is ONE baby. Not two at a time, ever again.) But after losing 73 of the 86 pounds I gained during my pregnancy, and being most definitely NOT pregnant, I really don't care to wear anything that might give that impression. And this? So gives that impression.

I look five months pregnant! (Of course, when I actually was five months pregnant, I was measuring as seven months pregnant. I definitely couldn't have wedged myself into this little thing.) [must admit that for this pic I am doing the pregnant sway-back thing a bit for emphasis, and not holding my tummy in the way I usually do]

I have seen tops from this pattern - Built by Wendy, Simplicity 4111 - all over the web and thought it looked so cute. At first I was a little concerned that the shape of it was a tad maternity-ish, but after I saw this one, I was convinced it didn't have to. I had fallen in love with the fabric while making a patchwork tablecloth with it (pics to come one of these days) and decided I had to make a top out of it.

Thing is, I never seem to learn. No matter what the measurements say (and I do go by body measurements, not my usual clothing size), I should always make my clothes one size smaller than indicated. Because the big problem with this top is that there is too much material both front and back, which makes it hang not close enough to my body. I really think without the extra fabric, I might not look pregnant. Also, there is this:


Jumbo sleeves. Even with the elastic threaded in, the sleeves are several inches larger than my wrists.

Other than all the extra fabric, it's really kind of a cute top, and comfy.

But how can I make it cuter (in a non-maternity way)? I haven't hemmed it yet because I wanted to get advice from all you seamstresses out there on how I should modify it. Should I take it apart and cut it down a bit? (including sleeves?) Should I try to put some waist shaping in? Should I take the elastic out of the sleeves and let them just be loose?

Or should I just get pregnant? ;)

Tuesday, April 24, 2007

Catching Up: the best-laid plans

At the rate I'm going, it'll be late summer by the time I finish blogging the things I made in March and April. I've been tempted just to skip it all and move on to where I am with things now. But I know that you, gentle reader, would be sorely disappointed to miss a single bit of news on earthchick's handcrafted adventures. So here ya go.

As mentioned before, I had big plans for Easter. I come from a family that does Easter up big. My cousin (who is the same age as me) and I would get matching dresses every year. That's right. Matching dresses. And matching jewelry and shoes (oh, and the shoes would be white because, you know, Easter marks the start of the white shoe season!). And sometimes even matching Easter hats. No, I am not talking about when we were 4 years old. I'm talking about when we were 14! (basically from the time were 9 or 10 until probably late high school. Okay, maybe a little later than that. I think I remember us having matching dresses when I was 19.) Yeah, I know. Geeky much?

And my mom and aunt and grandmother would get great new dresses too (not matching!). My brother and my male cousin would both wear suits (and my dad too, but he always wore a suit). My family (mom, dad, brother, me) would take about 20 pictures of each other before we left for church. Then we would go to church. Then we'd meet up with my cousin's family at my grandmother's house for more pictures. And they happened in every conceivable configuration - the four cousins, the two female cousins, the two male cousins, my family of four, my cousin's family, all the women, some of the women, etc., etc., etc. Then we'd all get changed and have a picnic. Good times.

Well now I live in Michigan and can't do family Easters any more, but the rest of the family? They still do the same thing as we always did (minus the matching dresses for cousin and me). And every year, I still feel the urge for a new dress. And of course, I have to have sweet little outfits for my boys. My Old Man? He pretty much does like my dad always did - make do with the same old suit.

But this year, since I'm doing the Wardrobe Refashion challenge, I couldn't just go out and buy all the good stuff. I had to make it. Or make do with what I already had in my closet.

Plan #1a. For the boys:

Yellow-striped shirts with coordinated yellow and lavender vests. I intended to buy khaki dress pants from our Parents of Multiples spring sale.

Plan #1b. For me:

An Easter dress for me. (isn't that a precious little print? isn't that a precious little pattern?)

As March marched forward, I soon realized I couldn't do it all. So I scaled back my plans.

Plan #2a. For the boys: do the vests, but buy shirts to go with them. At the end of March my two-month Wardrobe Refashion pledge was over. I re-upped, but this time it was only for myself. When April 1 hit, it was fair game for me to start buying clothes for the boys. I immediately ordered two yellow gingham shirts from Lands' End and went out and got khaki dress pants from The Children's Place (there were none at the Clothing Sale).

Plan #2b. For me: forget the dress, not enough time. Simple A-line skirt from Sew-U, paired with a white Talbot's twinset I already owned. The only thing I would need to get would be shoes (allowable under the Wardrobe Refashion pledge rules). Not white, though.

I happily finished the little Easter vests, using an awesome Zimmermanesque pattern from Little Turtle Knits and some Cascade Cotton Fleece. The yarn was okay, but to work it to gauge meant a looser weaver than is probably best for it (the pattern calls for worsted weight and this is probably closer to a DK weight). Also, over time, I became less-than-thrilled with the color combo. And I made the stupid, insane decision to do the second one completely in stripes. Not only did I not like the final affect, it became a real pain in knitting, esp. once I split the front and back (the bottom is knit in the round). The stripes were three rounds each, so once I split and worked back and forth, I had to cut the yarn at the end of each stripe (rather than let it float till I needed it again, the way I'd done when I was striping in the round). It was a total pain, it slowed me down, and it was not worth the effort. Of course the boys kind of liked it because it reminded them of Piglet.


Other problems ensued. The one on the left, for Tiny Dancer, didn't fit over his head. This could be fixed with a different bind-off, I'm sure, but I haven't done that yet. The one on the right fit fine. But I tried a different bind-off (learning from my first vest). It was definitely stretchier, but it ended up causing the neck and arms to look almost ruffle-y. A very girly effect, actually. In fact, when Little Buddha tried it on, it looked more like a little t-shirt with ruffled cap sleeves than a vest. Also, given the loose weave of the yarn at this gauge, I needed to pick up more stitches for the ribbing than the pattern called for. I did that in the first vest. But in the second vest I didn't, and the looser weave of the ribbing doesn't look great. In fact, overall, the loose weave in both vests bothered me a bit. And then the coup de' grace: the yellow of the vests didn't match the yellow of the gingham shirts (which, of course, I had no way of checking when I ordered them online).

Plan #3a, for the boys. So, on Good Friday afternoon (the day after I figured out the vests were a no-go), I went back out to The Children's Place - where they happened to be having a big sale - and scored the rockin' little ensembles you've already seen. The best part? Little Buddha refused to wear the Children's Place vest I had gotten for him (it coordinates, but doesn't match, Tiny Dancer's). My Old Man said, "Aren't you glad this isn't a handknit vest he's refusing to wear?" Indeed!

It was a bummer, putting 10 days into knitting those vests that didn't work out, when there are so many other projects I want to be doing. But in the end, I was much more pleased with what they wore than I would've been with what I had originally had in mind. I still plan to fix the bind-off on Tiny Dancer's vest (which I like a LOT better than the Piglet-striped one). And maybe I'll get them little white button-down shirts to wear with the vests every now and then. Regardless, I know I'll definitely knit this fun little vest again (and maybe even figure out the calculations to make one for My Old Man). But next time - I'll be using a 100% wool, worsted weight.

I know this post is dreadfully long already, but it wouldn't be complete without flashing the humble little A-line skirt I ended up with for myself (plan #2b worked in my case). Two hours on Good Friday night and I was done - I still can't get over how fast I can sew something versus how long it takes to knit something (not that I would ever knit myself a skirt, though I have to admit that this was so smokin' I almost thought twice about that commitment).

I still love the fabric, but the skirt was kinda blah, and it just wasn't that "dressed-up for Easter" look I have been conditioned to desire. What really did it in was my new Easter shoes - little ballet flats I got from Zappos (which look great with pants but I wasn't wild about them with this skirt). Maybe if they had been white? Next time I wear the skirt, I'll probably pare it with a heel.


The whole experience reminded me all over again of how much I dislike crafting with a deadline. It was particularly inane this year, with multiple other deadlines in my non-crafting life happening at the same time. As soon as I was done with the vests and the skirts, I commenced to working on a completely non-deadlined project, just something I felt like making. And it has been so freeing. But I'll catch you up on that one some other time. I know you can't wait....